- Leave the board always powered on.
- Press the Select Output button until the correct channel is selected.
- Then press the program output button
- On a Pro Cab Press “select accessory”, put in the new number, press enter
- Press 1 or 2, or N or R to complete the process.
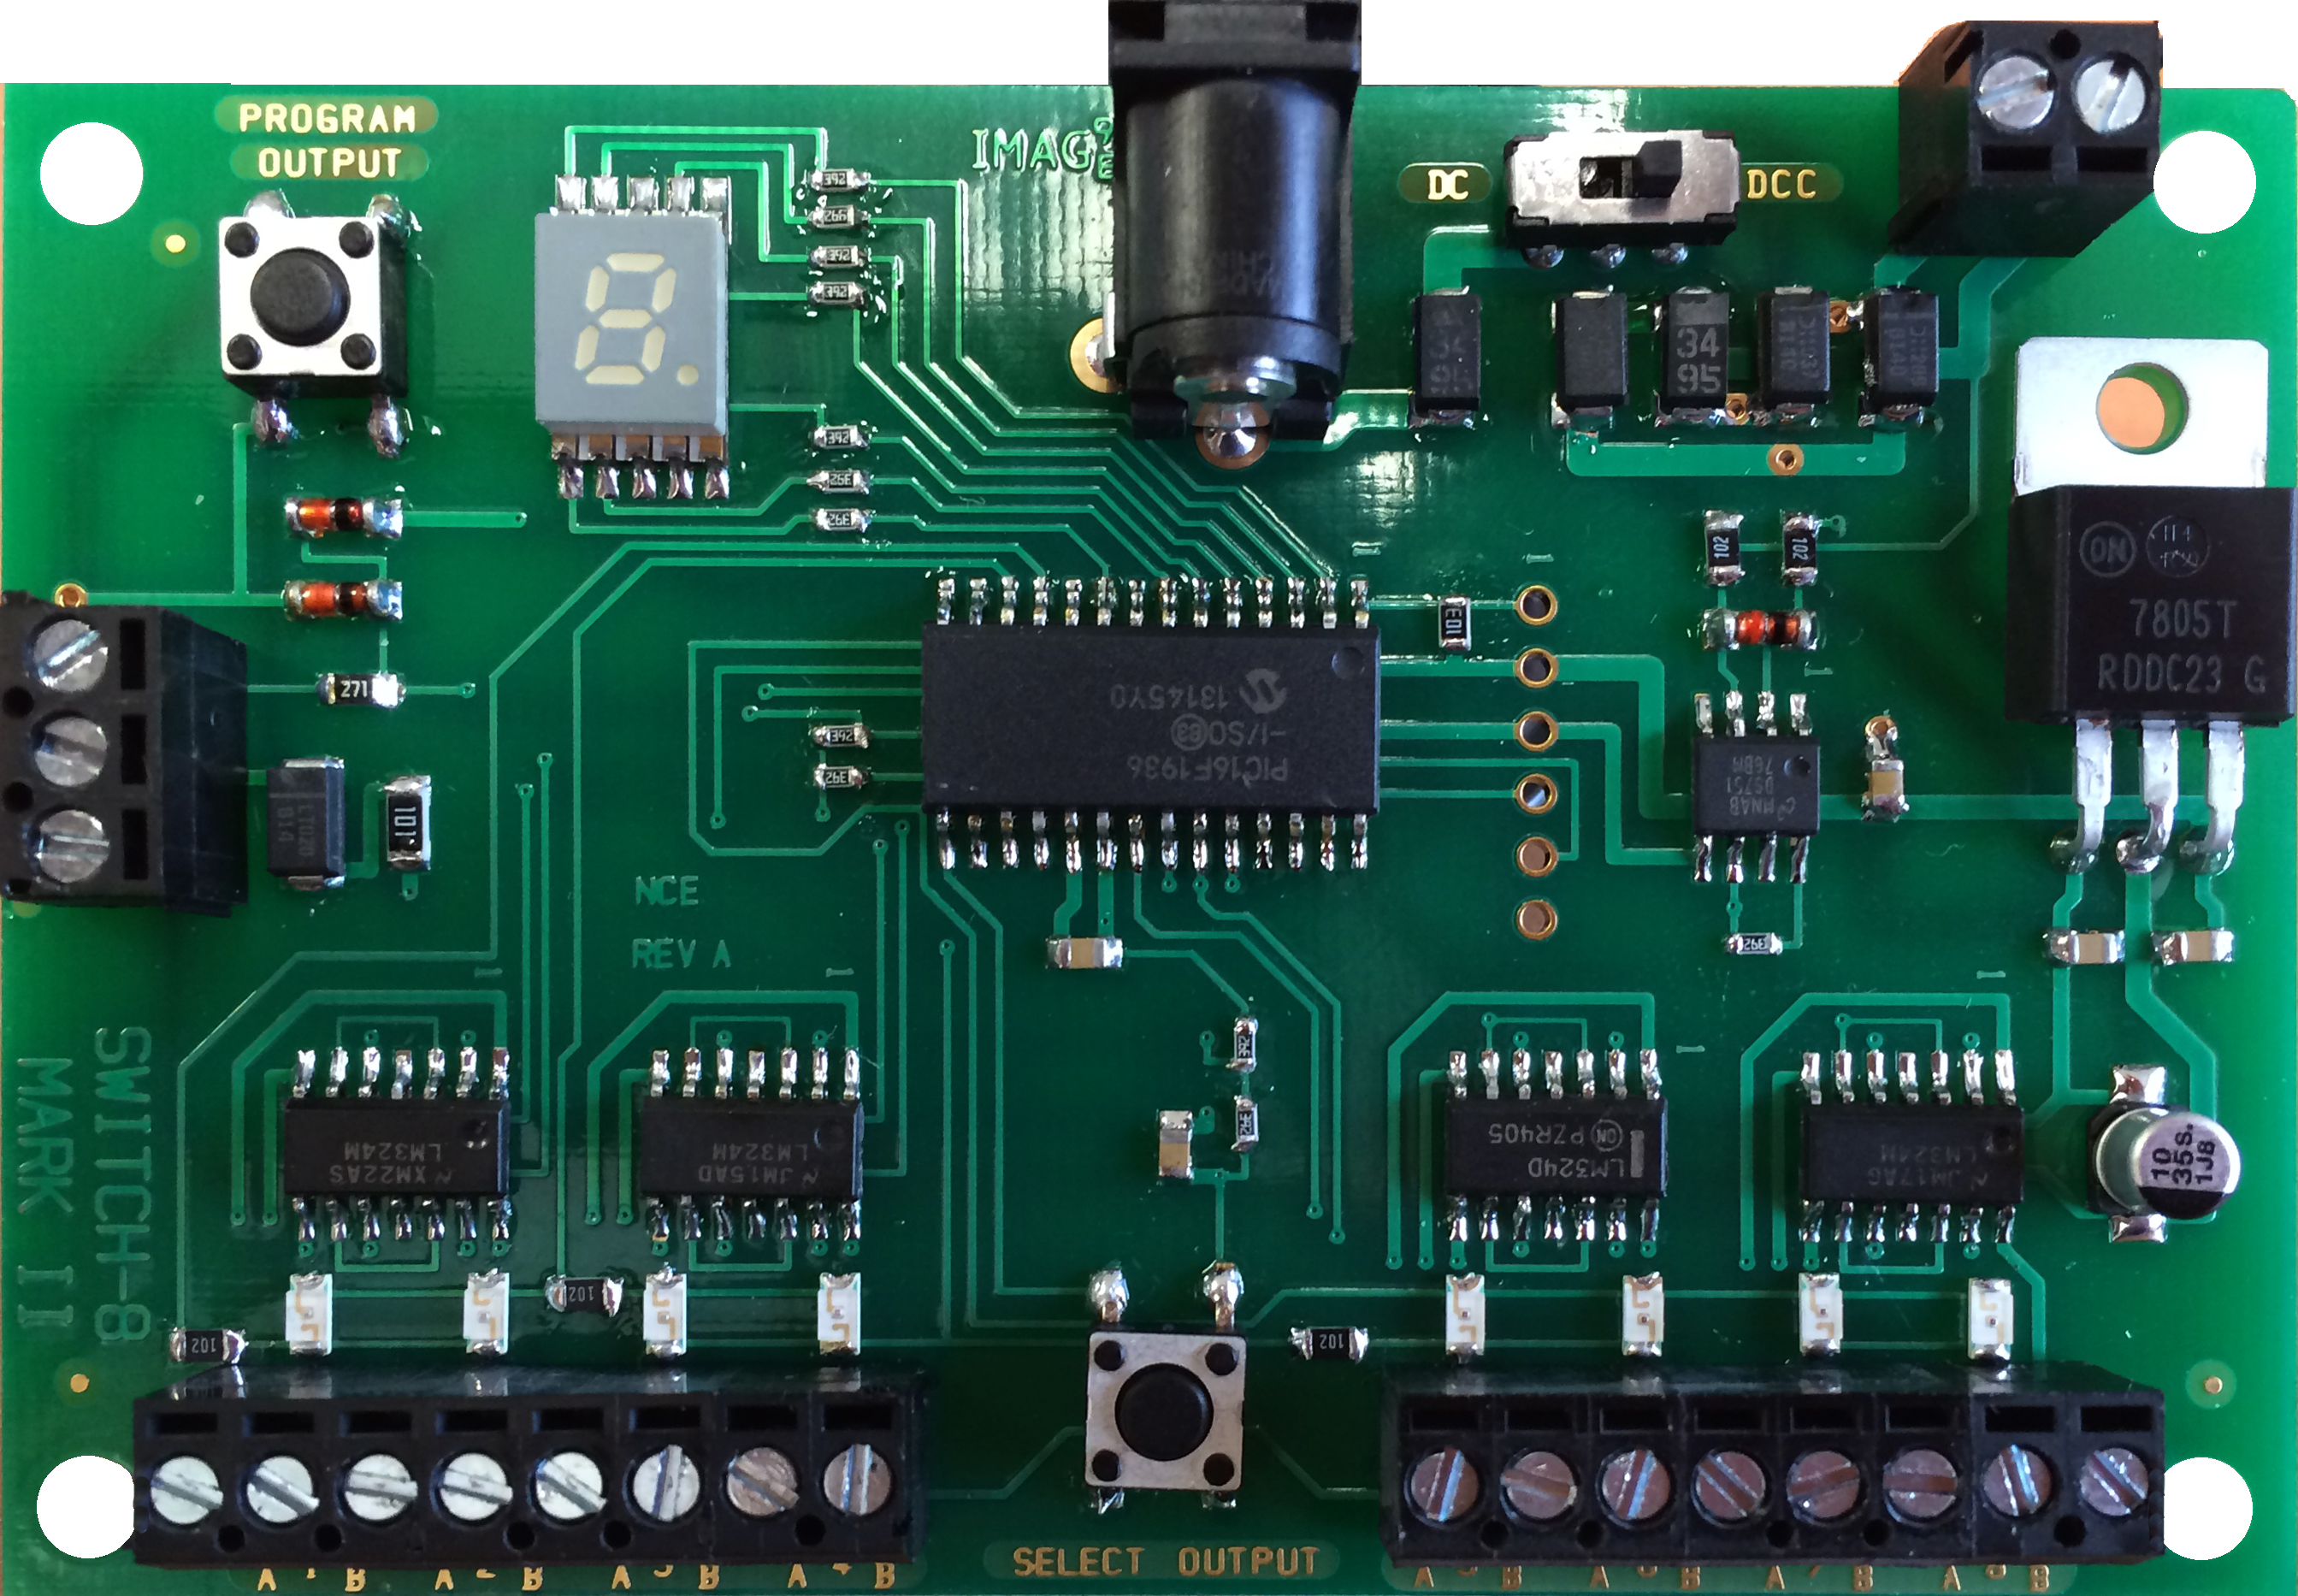
Output is maximum 40mA per channel. Note: Not for use with Micro-mark Switch Tenders or Cobalt / Cobalt IP switch machines. They draw too much power.
The Switch 8 Mk2 provides control for 8 stall motor type switch machines. It also remembers the position of switch after sudden power outages. Supports the full range of DCC accessory addresses (1-2044) Easy address programming with no need to connect it to programming track.
• Easy to program using buttons. No more jumpers!
• Improved user feedback with Onboard LEDs that provide visual confirmation of outputs being programmed and displays accessory addresses.
• Use Track power or External power.
2 wires to the track, 2 wires to each switch machine
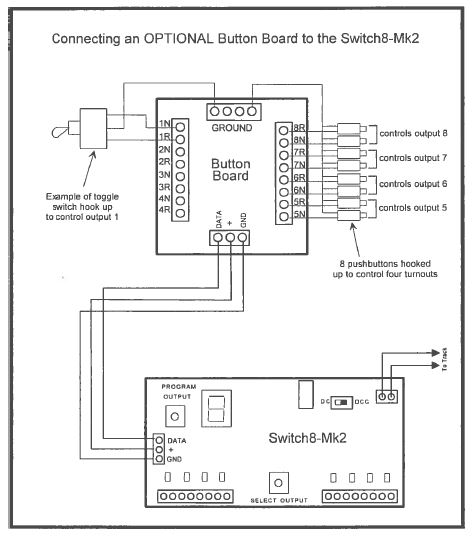
Connect optional "Button Board" for local push button control.
click here to buy a Switch 8 Mk2 now
Part Number 05240151

Optional Button Board Diagram
I just installed 4 switch 8 mark 2 on a layout that we are building for a customer. Installation was a breeze and programming was even easier. I like the way you can see output numbers after programming.
Hodccstuff